Tuesday, 25 April 2017

Creating Simple XSD


 Creating Simple XSD

In SOA or OSB, starting part of any communication is protocol and message, in a normal SOAP message, message has to follow a structure. In SOA this structure is defined by the XSD,


Let first consider we want to develop a structure of an employee, which is pass information like firstname,lastName, salary, dataofJoining,email and type. In jave world we can think of it as a java class having attribute mentioned.

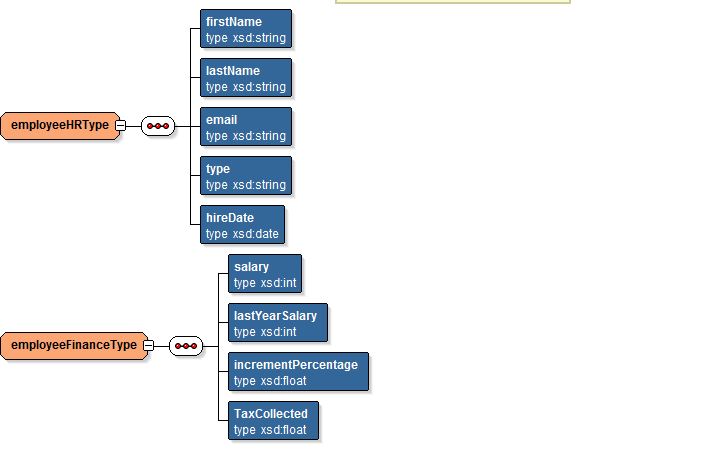
Now in XSD this can be a type, in xsd we have two kind of types, simple which are nothing but native types and other is complex which is a combination of simple types. Hence for this employee we are defining a complex type, which has every attribute defined.


To create this lets first think all the six information will be stored in six different attributes and we can  easily identified its type. now first lets think our process will take all these inputs. 


This is where we have structure defined, simply. Now its a type defined.


Now we can defined a complex type and then can assign it to and employee. Its something creating a class and then use a variable to assign.


 But now you want to keep finance information separate and person information separate, so you want to change the model something like

 Employee --- Person
                  --  Financial Details


Here first we need to create the structure and then we need to assign it to elements as type. Its can very well understand defining variable as a different class.


Now create two different variable and then assign type, which is created earlier. 


 Its the source code of the the xsd.


In the next blog we will talk about some other complex technique of the xml structure.

Thursday, 20 April 2017

ant-sca-compile.xml does not exists.


ant-sca-compile.xml does not exists.


If you have installed a new jdeveloper (11g) and got some error like this, while compiling or deploying a SOA project. 

 ant-sca-compile.xml does not exist

it will eventually fail the compiliation and also will not allow any soa deployment, to SAR or directly on weblogic server.


It normally happen, when during the installation there is any issue comes and jdev try to fix it, by modifying allready installed files and make them backup.


Solution 

go to the folder middleware\jdeveloper\bin and now check files with the .backup extension. Remove all extension from there and your jdev will be available to use.

If issue still presists then remove your system folder and restart jdev and try to compile again.

Most of the time your issue should be solved by now.


Tuesday, 7 March 2017

Hello world with Enriching Message in OSB - Build application step by Step

Hello world with Enriching Message in OSB - Build application step by Step


 1. Open the jdeveloper and from the Application select -> New it will open the below popup. Select the service bug application and click OK.


2. Now provide the application name as HellowWorldOSBApplicaton and then click finish. It will create an OSB application.


3. Now you need to create a OSB project, now again Applicaton -> New Project else Cntr + N will also open the same wizard.

4. Now select the service Bus project and click Ok it will open the wizard to start creation of the service bus project.


5. Provide the name as HelloWorldOSBProj, once click on finish it will create a service bus project with composite. With 12c Composite is part of both application.


6.  Application will look like this post creation of project.

7. In OSB no seperate folder will be created for the WSDLs or xsds. But it advised to create the  separate folders for wsdls or schema.


8. Provide the folder name as WSDLs and click on finish. It will create folder.


Business Service creation 


9. Once done double click on composite and open the composite in editor, once its open select the HTTP and place it on the external service side. Its a wizard to create business service creation.


9. Provide name as EmployeeCheckBS and click next. 

                                   
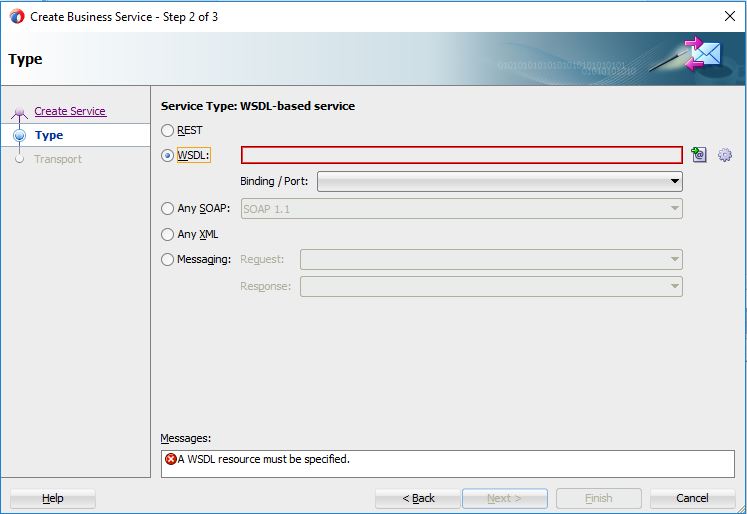
     10. Now click on WSDL to select the WDSL and click on the icon to select the  wsdl.


 11. Now select the WSDL from the applications server.  Again SOA application given in part 1 should be deployed on SOA server.


12. Once selected step 1 will be auto populated with all the WSDL information.


13. Now Business Service wizard will ask to import the information, concrete WSDL and also schema. click Finish.

14. Now WSDL information will be populated to base wizard check it and click Next.


15. Leave the values as default and click finish. By this business service will be created.

Refactoring & Rename


16. Now you can rename xsd to schema folder, by selecting xsd and right click -> rename to EmployeeCheckSchema.xsd


17.  Post this select the xsd and refactor it to different folder name it Schema if not created till now.


Pipeline Creation


18. Again open the composite and from the component select the pipeline and place it to middle or the composite.   It will start the wizard to create the pipeline. Now name pipeline to EmployeeCheckPS and click Next.


19 Now  click on wsdl and then click on the icon to select the WSDL.


20. Now this concrete WSDL  is part of the application select it from the application and click ok.


21. Now the wizard will look like this keep the expose as proxy service and click on finish.


22. This will open up the editor like this where proxy is created with a pipeline.


23. Add the line between the pipeline and business service. Its complete the Pipe line creation activity.


Logic for Inset and Assign


24.  Now double click on the EmployeCheckPS (pipeline) and it will open the pipeline editor. 
 25.  Now create a variable, to store the employee Name. Name as employeeName.


26.  Now add a pairline to the pipeline. It will add the response and request lines to the pipeline.


27. Now add Assign to request Node.  Assign use to assign some value to variable.


28. Now select the employeeName in the editor and select variable as employeeName.


30. Now add insert into the response line and then insert tag as given below


31. Now add the add the if else to the response pipeline and add in if one insert activity.
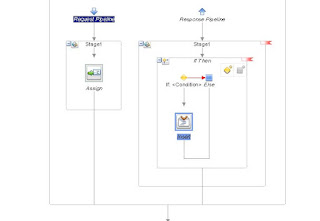


32. In the insert statement add the tag and position to be after the body.

32. Now add it to after the employeeId, by double click on the if, it will open the editor to add/modify the add condition.


33. Use expression builder to modify the condition.


Now project is almost ready to deploy, use previous post to deploy and test, post 1.


Sunday, 5 March 2017

Hello world with Enriching Message in OSB

Hello world with Enriching Message in OSB

Jdev Ver :- 12.2.1.2.0

About the sample Code.

 This tutorial is based on one simple webservice, which will tell us if an employee is active or not_active also it will tell us if employee does not exists.  With the OSB we are trying to write the proxy web-service. The original webservice is written in SOA, if you know SOA the fine if not then also fine. first to make you little comfortable in OSB please download these 2 code and deploy as given.


1. SOA Service :- Please download the employeeService.jar file by clicking on the link. Once you are done with the download please open jdev and run the server. Hope you are familiar with em console and deployment process, if not follow the instructions given.

 a) Login to em console of the application, using the username and password and click on the


b) Now click on default and then select deploy to this partition.


c) Choose the location of SAR (jar) file and then choose deploy.


d) Once deployed, test the service using the browser.


  Service should be able to test using the browser  and url

      http://localhost:7101/soa-infra/services/default/EmployeeCheckService/employeecheckbpelprocess_client_ep


  Now download the application from link and then open it in the jdeveloper.  This will look like as given below.


1. Open the application in the jdeveloper, it will look like similar to below.


 2. Now click on the project and right click and choose deploy and select project name for deplyment.


3. Choose option to deploy to server.


4. Now select the server as we are using integrated server( feature introduced in 12c).


5. Now deployed to the server  and click on finish.


6. See the deployment log, which says deployment completed successfully.

7. Now login to http://localhost:7101/Servicebus, once login you can see the application deployed.


8. Now click on the EmployeCheckPS and then now click on the run button, which will open the service console.


9. Now service bus console will open to test it. enter the name and id as given below.


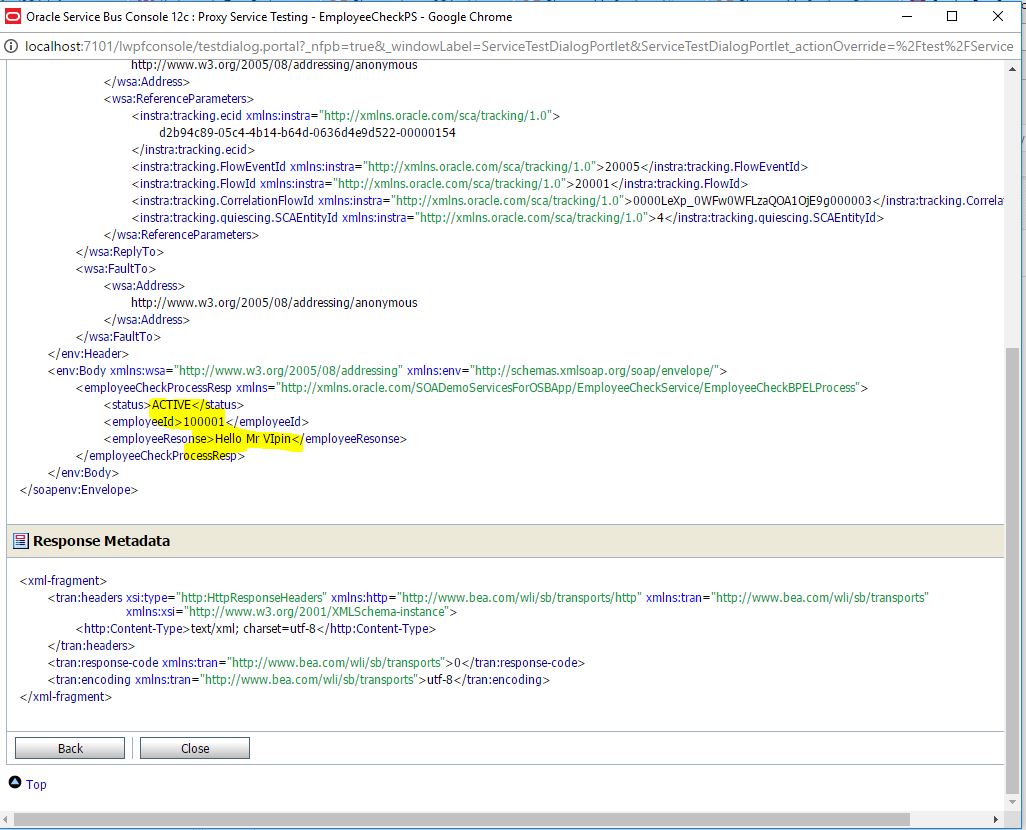
10. Now it will provide the response as given below.


In the next post I will explain about building this sample.