Hello world with Enriching Message in OSB - Build application step by Step
1. Open the jdeveloper and from the Application select -> New it will open the below popup. Select the service bug application and click OK.

2. Now provide the application name as HellowWorldOSBApplicaton and then click finish. It will create an OSB application.

3. Now you need to create a OSB project, now again Applicaton -> New Project else Cntr + N will also open the same wizard.

4. Now select the service Bus project and click Ok it will open the wizard to start creation of the service bus project.

5. Provide the name as HelloWorldOSBProj, once click on finish it will create a service bus project with composite. With 12c Composite is part of both application.

6. Application will look like this post creation of project.


8. Provide the folder name as WSDLs and click on finish. It will create folder.

Business Service creation
9. Once done double click on composite and open the composite in editor, once its open select the HTTP and place it on the external service side. Its a wizard to create business service creation.

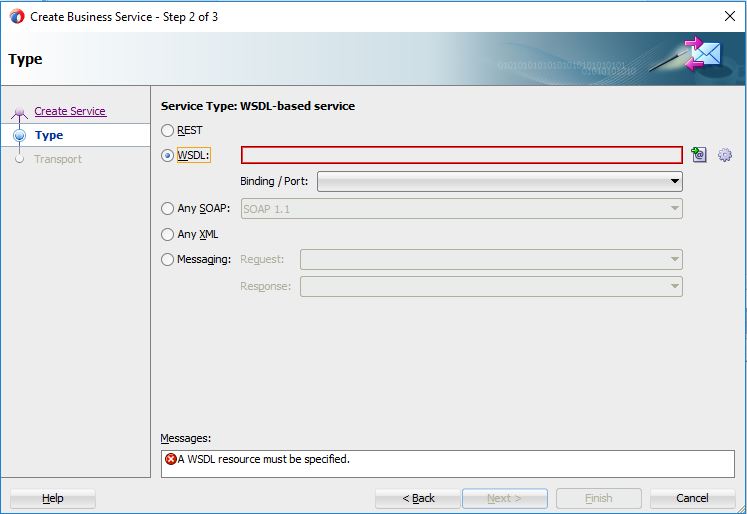
9. Provide name as EmployeeCheckBS and click next.

10. Now click on WSDL to select the WDSL and click on the icon to select the wsdl.
11. Now select the WSDL from the applications server. Again SOA application given in part 1 should be deployed on SOA server.

12. Once selected step 1 will be auto populated with all the WSDL information.

13. Now Business Service wizard will ask to import the information, concrete WSDL and also schema. click Finish.

14. Now WSDL information will be populated to base wizard check it and click Next.


Refactoring & Rename
16. Now you can rename xsd to schema folder, by selecting xsd and right click -> rename to EmployeeCheckSchema.xsd

17. Post this select the xsd and refactor it to different folder name it Schema if not created till now.

Pipeline Creation
18. Again open the composite and from the component select the pipeline and place it to middle or the composite. It will start the wizard to create the pipeline. Now name pipeline to EmployeeCheckPS and click Next.

19 Now click on wsdl and then click on the icon to select the WSDL.

20. Now this concrete WSDL is part of the application select it from the application and click ok.

21. Now the wizard will look like this keep the expose as proxy service and click on finish.

22. This will open up the editor like this where proxy is created with a pipeline.

23. Add the line between the pipeline and business service. Its complete the Pipe line creation activity.

Logic for Inset and Assign
24. Now double click on the EmployeCheckPS (pipeline) and it will open the pipeline editor.


26. Now add a pairline to the pipeline. It will add the response and request lines to the pipeline.

27. Now add Assign to request Node. Assign use to assign some value to variable.

28. Now select the employeeName in the editor and select variable as employeeName.


30. Now add insert into the response line and then insert tag as given below

31. Now add the add the if else to the response pipeline and add in if one insert activity.

32. In the insert statement add the tag and position to be after the body.


33. Use expression builder to modify the condition.